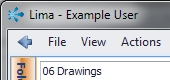
The current user's details are displayed throughout your session in the top left hand corner of the interface (as shown above). In the example, the user is Kevin Blackshaw. If your username is not displayed, please select log out and exit from the file menu. This can occur when a computer is used by more than one user and they chose to exit the software without logging out.
B: Main Menu
Any of the titles in the main menu can be accessed with a left click and support a host of software features such as logging out and access to the Lima Help Centre. Menus are covered more thoroughly in the "Menus, Toolbars and Keys" section.
C: The Project Window
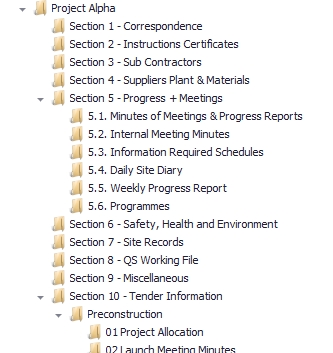
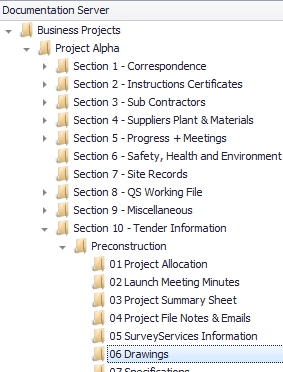
The project window contains the folder structure of your project. Here we are inside a project called Project Alpha on the documentation server. Only project folders are shown in this section, files contained within folders are displayed in the folder contents window explained in section "E".
D: Windows Resize
As you move your mouse pointer around Lima you will be provided opportunities to tailor its look and feel. One such feature is the ability to change the size of both the project and folder contents windows. This is achieved by moving your mouse pointer into the space between the windows. Once there, the mouse pointer will change from the familiar white arrow to a black vertical (or horizontal) line intersected with a double-headed arrow. Hold the left mouse button down to drag the windows.
E: Folder Contents
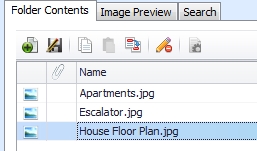
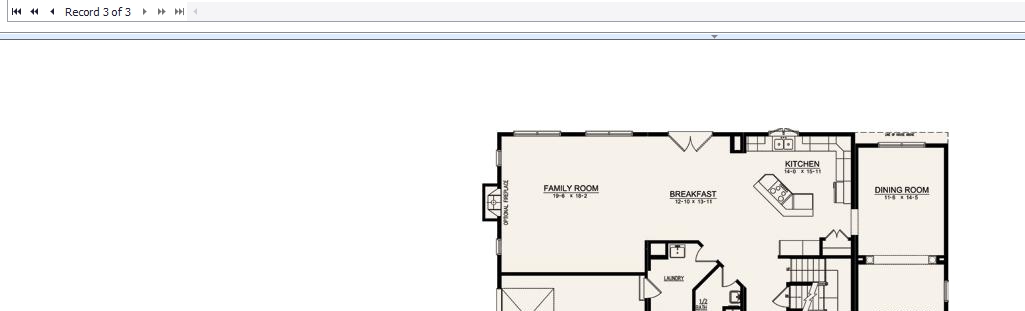
The folder contents window is used to show the files located in the folder specified in the project folder window. Folders contained within folders are not shown in this window. In the example shown above there are three pictures in the folder and the file "House Floor Plan.jpg" is presently selected.
Lima indicates the selected file by highlighting it in blue. This is the file that will be displayed in the preview window. In the example shown above the file "House Floor Plan.jpg" is selected. Note, that the columns in the folder contents window can be changed to display different information pertaining to the files.
Presently, the date the file was added to the system and the file's size are displayed. The column manager can be used to tailor how file information is displayed.
G: Close, Minmise, Maximise and Restore
As with most windows based applications Lima supports the close, mimimize, maximize and restore feature. These buttons change and offer different features depending on how you are working in Lima:
View 1:
Here the three buttons are (L to R), minimze which returns the application to the taskbar at the bottom of the windows environment. When minimzed the application is still logged on and can be accessed by clicking on the word Lima at the bottom of the screen. The second button allows you to maximize Lima. When maximised Lima takes advantage of the maximum amount of space on the screen. The third button represented by the "X" closes Lima without logging out. Using the "X" is the same as selecting the Exit option from the file menu.
View 2:
In this view both the minimize and close buttons are the same. However, the middle button has changed to the restore feature. Click this to move Lima around the desktop or to change the size of the Lima interface. This can be useful when users require to see multiple applications at the same time.
H: Quick Links Menu
There are five buttons on the quick links menu (L to R) -
Show Preview Window -
Shows a preview of the file selected in the Folder Contents window.
Show Comments for this Item -
When selected the preview window changes to show any comments that are associated with the selected file. If a file has comments, the icon changes to display a green tick (shown below). Working with file comments is covered more thoroughly in the file comments section.
Refresh -
The refresh button can be used when the user is aware that a file has been updated, but the update is not showing in Lima. Additionally, if a user is waiting for a file to be updated by another user at a different geographical location the refresh button may allow the first user to see those changes faster than the default time intervals used by Lima.
Email Link -
"Create an email link to this item" is an innovative feature that allows a user to email one or multiple people information pertaining to the selected file. This feature can be used if a file has been updated and you need to inform others about said changes. This feature is explained more thoroughly in the "Sending Links to Email Users" section.
Show document in full screen -
The magnifying glass with the "+" changes the Lima Interface to display the selected file using the full screen. The magnifying glass with the "-" allows the user to return to the Lima Interface shown above.
I: Online
The word "online" should always be displayed when working in Lima. It indicates that the client is connected to the server and that the information being displayed is live and current.
J: File Path
The file path shows the location of the selected file. The top level is displayed on the left. The folder containing the file in the example is "06 Drawings". This is a text based version of the project window.
K: Preview Window
The preview window shows the contents of a file without the user having to open in. The example is "House Floor Plan.jpg", a picture file.
L: Current Server
Lima supports access to multiple servers. When working in a project it is important to ensure that you are connected to the correct server. If you cannot find specific folders and files it is possbile that Lima has been connected to a different server. To change this, select "log out and exit" from the file menu. Then log back in with the correct server information.
M: Current Location
The users current location is indicated visually in the Project Window by the folder that is highlighted in Blue. This is a visual version of the path information shown in "J: File Path".
NB folder information is always shown in the project window, whereas the files contained within the folder all always displayed in the folder contents window to the right.
N: Advanced Features Taskbar
The advanced features taskbar allows the user to change the function of the Project Window to either display, Folders, Favourites, Templates, Management and Modules. By default the folders window is selected when you log in to Lima.
Each of these sections are explained in more detail throughout the help guide.
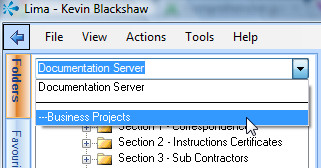
O: Doucment Server / Returning to the Top Level
By default the drop menu displays the current server (see the Current Server Section). However, when selected the drop down menu can be used to return to the top level of the current project. See below -
P: Show/Hide the Project Folder Window
The show/hide feature is available for all users working within Lima. However, it can be used specifically by users working with lower resolution monitors. When selected the Project Window is hidden to optimise the available space for both the Folder Contents and File Preview windows.